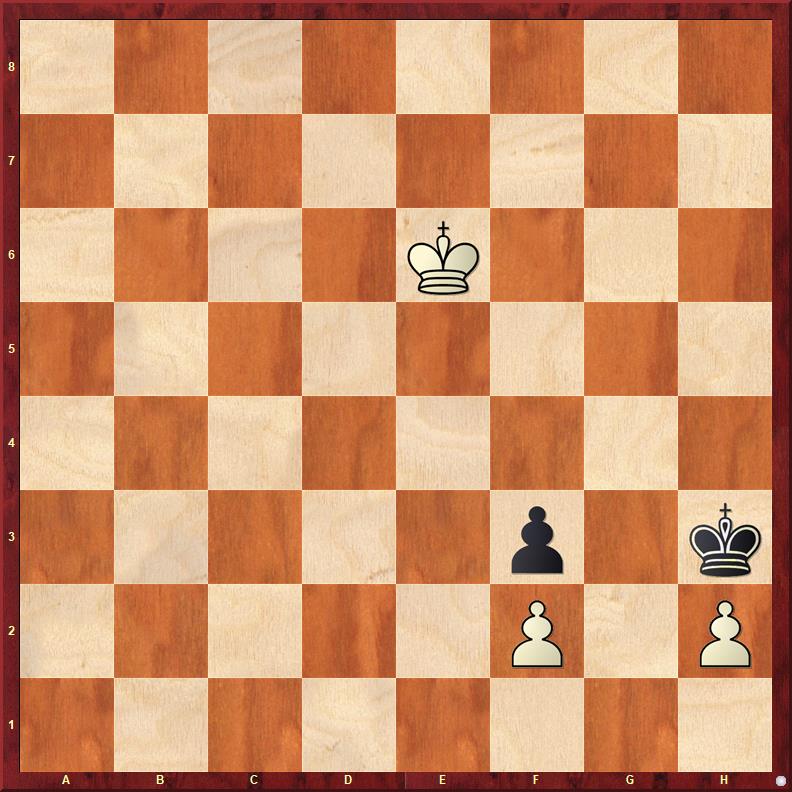
Have you ever heard that pawn endgames are not as easy as they often seem? Probably. See for instance this study by Joseph Moravec (1925). What is your first thought when you see this position?
You probably think: it looks great for black. You are right: white has to fight for a draw. The question is can white make a draw?
It is almost immediately clear that white has to walk towards the f-pawns. He should not wait for one moment to close in on the f-pawns. If he hesitates then black first eats the h-pawn and after this he consumes the f-pawn and white is lost. But what route does white follow to the f-pawn? That’s the tricky part.
Some precise moves are called for. 1. Kf4 is wrong. Black leaves the h-pawn for what it is and consumes the f-pawn and promotes the pawn with a check.
Likewise, 1. Ke5 is wrong. You probably already sense how white goes astray. White moves his king to the diagonal a1-h8. Because black promotes a move earlier, the white queen is immediately lost after a check on a1. So what remains is the somewhat counterintuitive 1. Kd5! See the complete analysis.
